”How do I set up delivery on my WooCommerce webshop?”We help you set this up easily and quickly! By setting up shipping zones on your WooCommerce, you can control which shipping options are to be displayed in your checkout flow on your webshop.
1. WooCommerce freight.
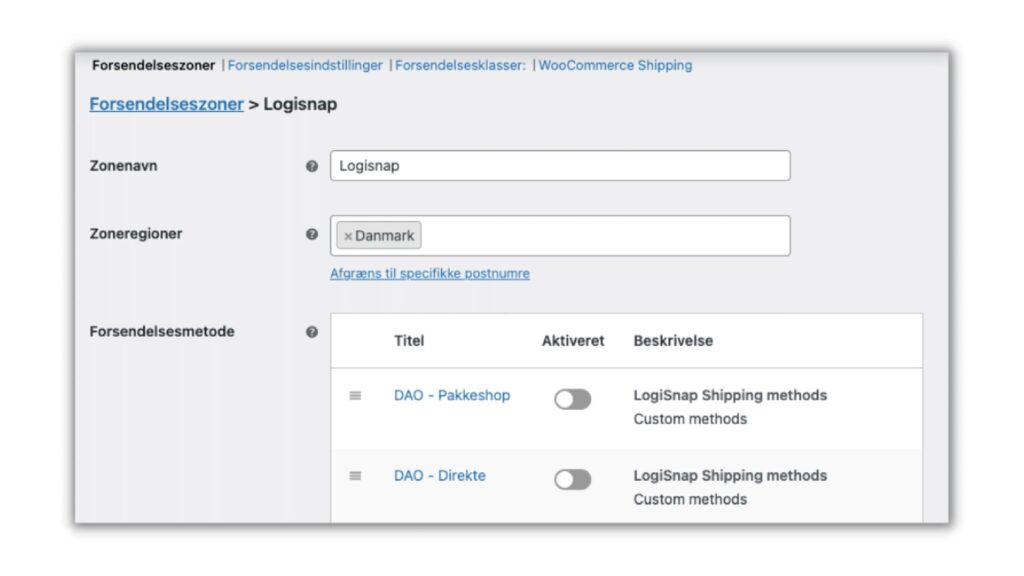
1. Select the WooCommerce → Settings menu item
2. Select the Shipping tab
3. Click on Add Shipping Zone
4. Add a zone name and specify zone regions (countries)
5. Click on Add Shipping Method
6. Select LogiSnap Shipping methods
7. Click on newly created shipping method (so you can edit it)
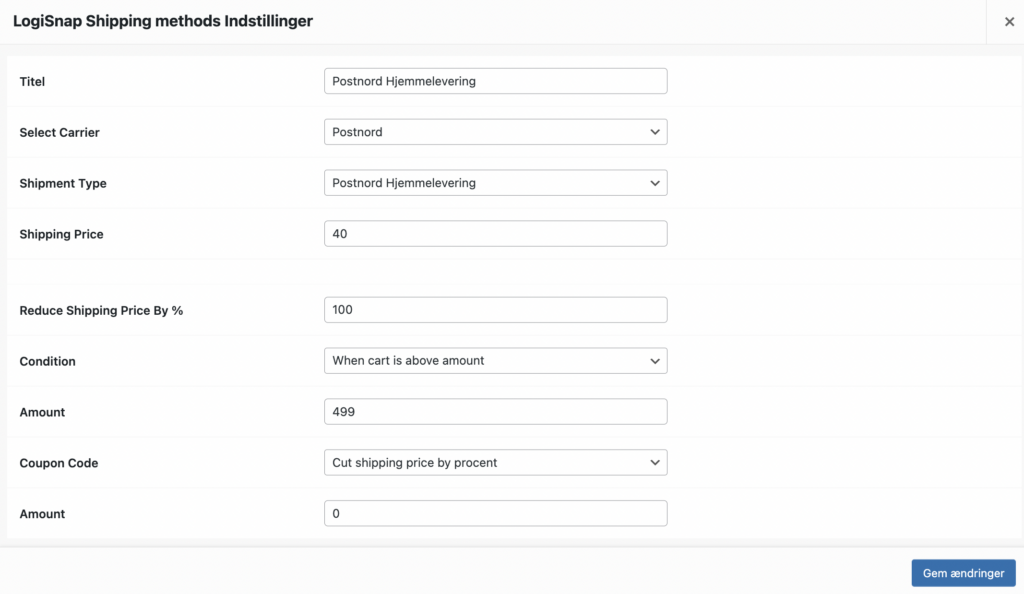
8. Enter title here (which is the name your customers will see in the checkout flow)
9. Select carrier (Shipping Method)
10. Select delivery type (Product), enter the customer’s shipping price (Cost) and any conditions (Coupon Code)
11. Click on Save Changes
12. Repeat procedure with all desired delivery options
2. Help to create free shipping on a certain order value.
If you want to offer free shipping on orders above a certain order value, see here:
1. Tap on the desired shipping method
2. Write here in Amount the desired price for when there should be free shipping
3. Set Condition to ”When cart is above amount”
4. Then set ”Reduce Shipping price by %” to 100
5. Then tap Save Changes
Afterwards, the changed shipping method will be displayed in the checkout flow on your WooCommerce webshop as free shipping on orders above the amount you have set your Amount on.
Now your data flow runs completely automatically and your customers can choose their desired delivery method in the basket. Every time a customer completes an order on your webshop, order data is sent to LogiSnap, so you can pick, pack and send orders.
Remember that you can change the delivery on your checkout flow at any time, so hurry to set up your checkout flow so that your customers can buy products from your shop already today!