Guide – Shipping Platform

Wallet Recharge.

There will be three options for topping up your wallet.

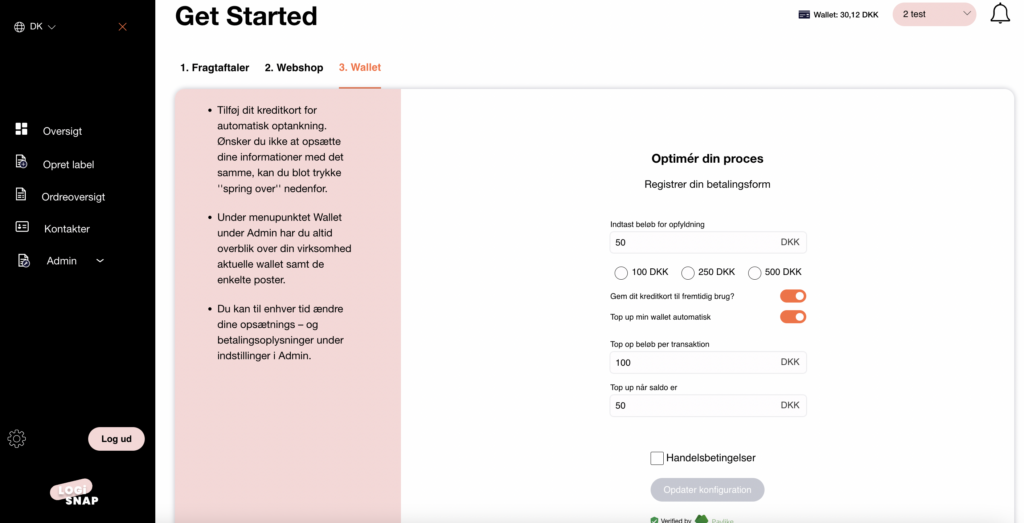
The first option is through our onboarding flow, which is the third step you encounter after creating an account on LogiSnap.

The second option is to add funds to your wallet through the settings menu under the admin menu on the left side.

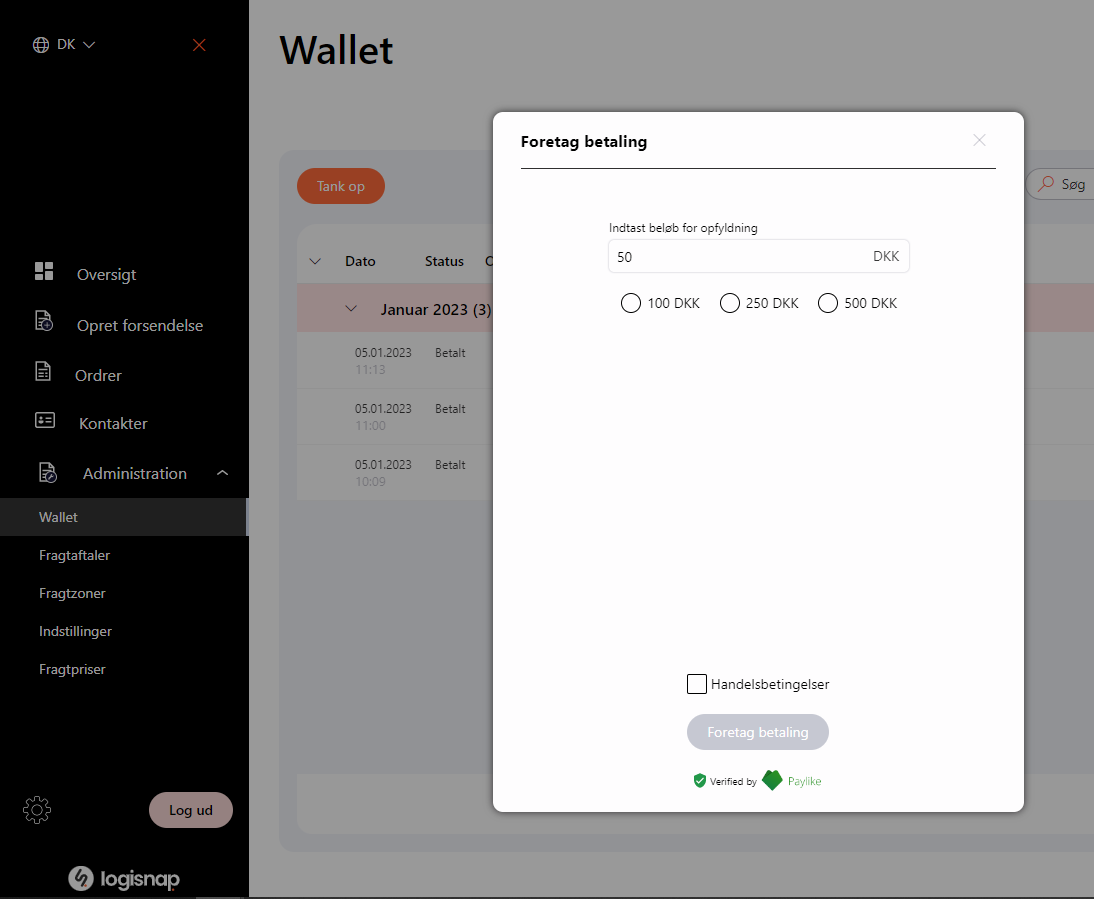
The third option can also be found in our admin menu on the left side, where you simply click on “wallet.” (Automatic top-up cannot be done at this step, but it is available in the other two methods.)

All methods are described in the guide below.

1. Recharge your wallet through the onboarding flow.

  1. You will start by landing on our “Get Started” flow, which will guide you through 3 simple steps to create your LogiSnap account.
  2. The third step will involve topping up your wallet.
  3. Enter the desired amount you wish to add.
  4. Check the box to agree to the terms and conditions.
  5. Click on “Update Configuration” (you will have the option to enter your card details here).
  6. Once you click “Pay,” you will be able to see the deposited payment in your wallet.


If you wish to enable automatic top-up for your wallet, please read on:

  1. Add “Save my credit card for future use” option.
  2. Add “Automatically top up my wallet” option.
  3. In the first box labeled “Top-up amount per transaction,” enter the amount that should be transferred from your credit card to your account each time your account balance reaches a certain threshold.
  4. In the second box labeled “Top-up when balance is,” enter the minimum amount your wallet should have before new funds are added.
     

Afterward, your wallet will be automatically topped up whenever it reaches your minimum amount.

2. Automatic topping up of the wallet through the admin menu (left side).

  1. Click on the Admin menu on the left side.
  2. Then click on “Settings.”
  3. Enter the desired amount you wish to add in the “Configure your payment” section.
  4. Select “Save my credit card for future use.”
  5. Select “Automatically top up my wallet.”
  6. In the “Top-up amount per transaction” field, enter the amount that should be transferred from your credit card to your account every time your account reaches the specified amount.
  7. In the “Top-up when balance is” field, enter the minimum amount your wallet should have before new funds are added.
  8. Check the box to agree to the terms and conditions.
  9. Click on “Update Configuration” (you will have the option to enter your card details here).
  10. Once you click “Pay,” you will be able to see the deposited payment in your wallet.
 

Afterward, your wallet will be automatically topped up whenever it reaches your minimum amount.

3. Topping up your wallet through the admin menu (left side).

  1. Click on the Admin menu on the left side.
  2. Then click on “Wallet.”
  3. Click on “Top up” in the top left corner.
  4. Enter the desired amount you wish to add in the “Make payment” section.
  5. Check the box to agree to the terms and conditions.
  6. Click on “Make payment” (you will have the option to enter your card details here).
  7. Once you click “Pay,” you will be able to see the deposited payment in your wallet.

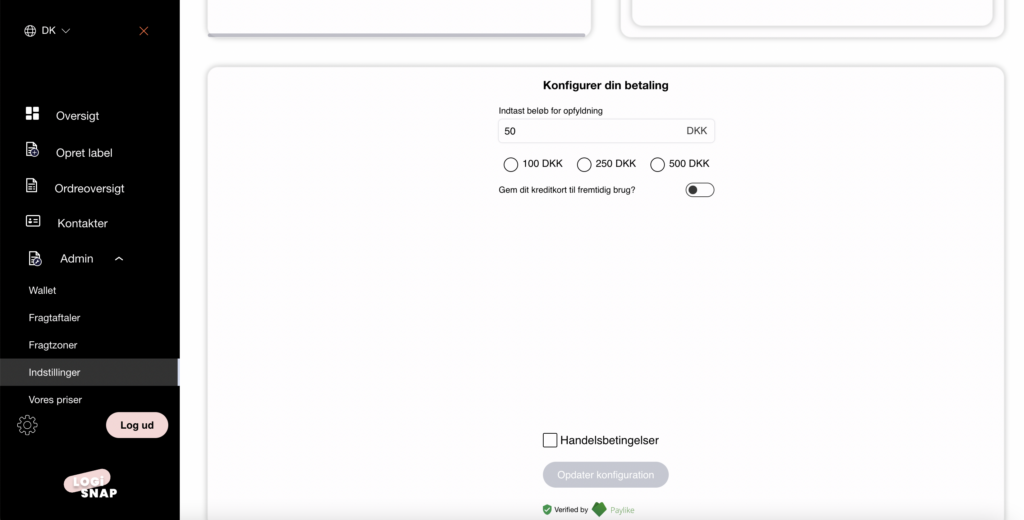
Please note that automatic top-up cannot be done in this step.

Once you have topped up your wallet, you can get started right away with printing your shipping labels and sending off your packages. So, what are you waiting for? Let’s get started!