Guide – Shipping platform
Automate your data flow between your webshop and LogiSnap to be able to easily pick your goods, print labels and have your packages sent. Regardless of whether you are going to start a brand new Shopify webshop or simply need to switch from another shipping platform, we will do everything to help you get started.
*If you wish to give your customers the opportunity to choose between several delivery options in the basket on your webshop, you must activate your so-called CarrierService API. To be able to activate this, Shopify requires that you either have an Advanced or a Plus subscription to be able to access this feature.
If, on the other hand, you have a regular Shopify subscription, you can gain access by signing up for annual payment or by purchasing the service (Third Party Carrier Calculated Shipping) on a monthly basis.
If, on the other hand, you have a basic subscription, this is not an option, you will still get your order information into LogiSnap and process it, but here you must manually add the desired delivery to the individual order.
First of all, great that you choose to use LogiSnap to handle your parcels. We want you to get off to a good start, so we will now take you step by step through the integration to your Shopify webshop.
Have you created an account in LogiSnap? If not, get started by setting up your business quickly and easily right here, then follow a simple setup guide. Once that’s done, you’re ready to return to the guide here.
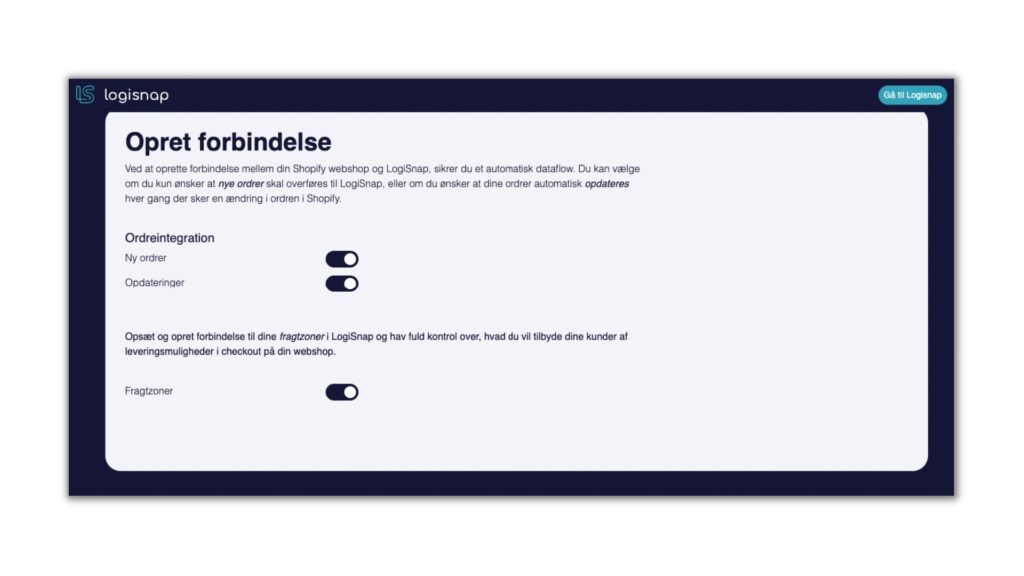
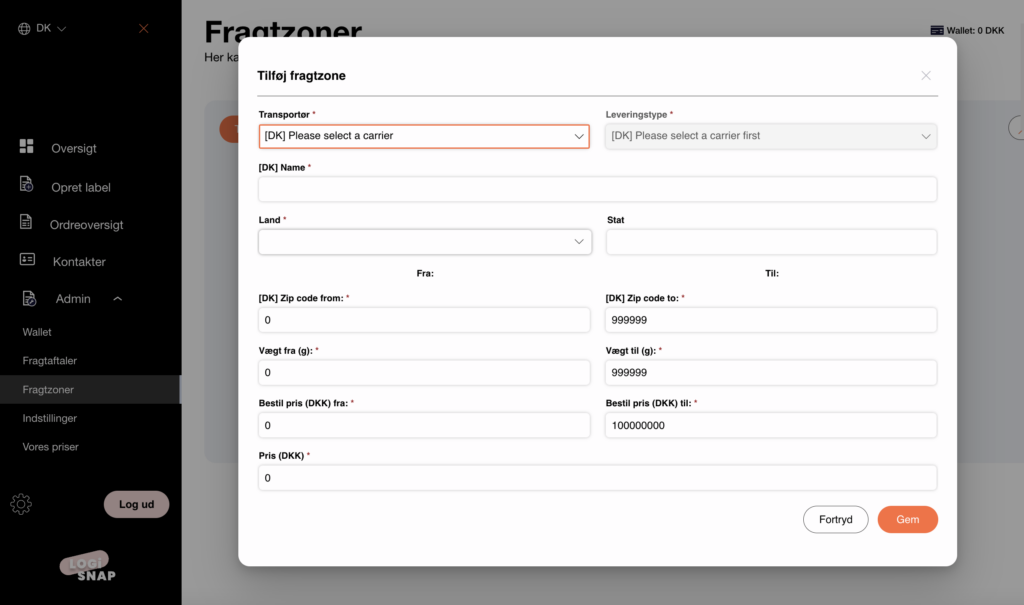
**Make sure to have your freight zones set up on LogiSnap beforehand!**
1. Go to Apps
2. Click See more apps in this collection / Customize your store
3. Search for LogiSync
4. Select the app and click on Add app / Add app
5. Select install app / install app
6. Login with your LogiSnap login
* If you have several webshops associated with your LogiSnap account, you will have to choose here which webshop or company you want to integrate your Shopify with.
7. Turn on new orders (then your orders will automatically be entered from your Shopify to LogiSnap)
8. Turn on updates (if you are ok with if there are updates on LogiSnap this will update automatically)
9. Turn on shipping zones (so you have full control over what delivery options you want to offer your customers in the checkout at your shop)
10. After this, you will simply have to go back to your Shopify shop and refresh the page, and then your information from LogiSnap has been downloaded to your shop.
If you already have a shipping platform connected to your Shopify webshop, you must decide whether you want to:
1. Connect LogiSnap in parallel with your current solution
2. Deactivate your current solution and only use LogiSnap in the future
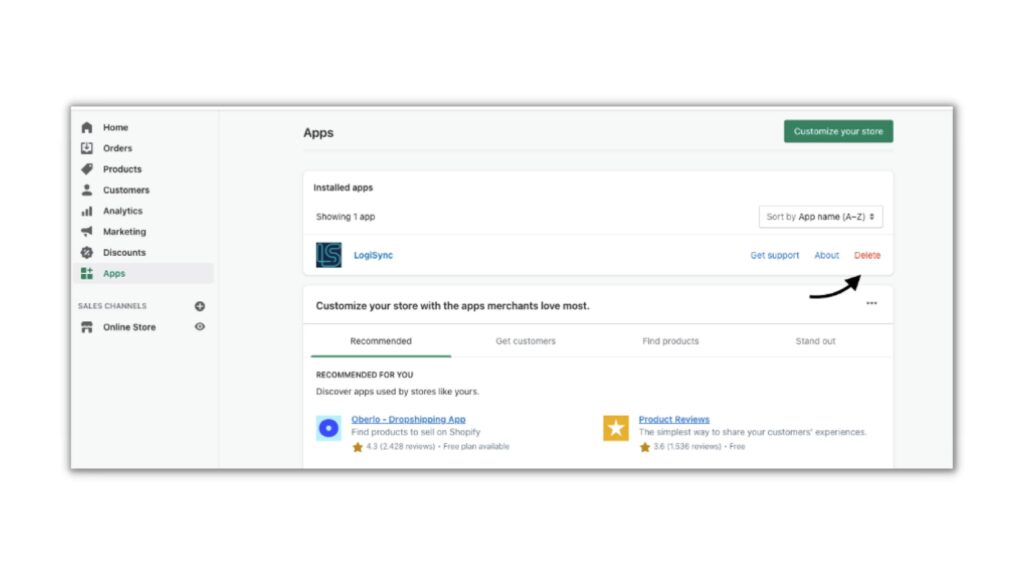
If you choose to drive parallel, you do not have to do anything else. If, on the other hand, you want to deactivate your old solution, you must delete your old app in Shopify, as shown in the image below.
After this, you are completely done and ready for a new adventure with LogiSnap as your future freight platform!
Herstedvang 8
DK – 2620 Albertslund
CVR: 41726032
© 2022 Logisnap