*If you want to be able to give your customers the opportunity to choose between several delivery options in the basket on your webshop, you must activate your so-called CarrierService API. To be able to access this function, it is a requirement from Shopify that you either have an Advanced or a Plus subscription. If you have one of the above, you can simply read on to the guide.
If, on the other hand, you are signed up for a regular Shopify subscription, this must be signed up for annual payment or purchase the service (Third Party Carrier Calculated Shipping) on a monthly basis.
Unfortunately, the feature is not available as a Basic subscription customer, however, it is always an option to simply synchronize your order data, so that you can easily streamline your order handling in LogiSnap.
Get started.
Have you created an account in LogiSnap? If not, get started by creating your business quickly and in Logisnap, following a simple setup guide. Once that’s done, you’re ready to return to the guide here.
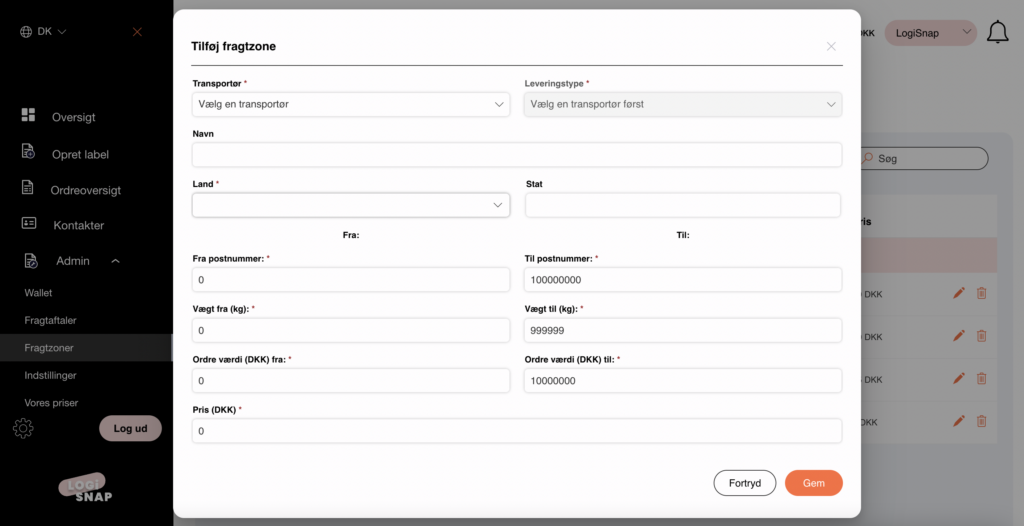
1. Set up freight zones.
As one of the first steps in the integration of your Shopify webshop, you must set up your shipping zones. Shipping zones are the delivery options that you want to offer your customers in the basket on your webshop. You can either set them up inside Shopify or quickly and easily inside LogiSnap.
If you choose to set up your delivery options in LogiSnap, it requires that you have created your freight agreements in the setup.
1. Open LogiSnap and login
2. Tap on administration on the left side and select shipping zones
3. Click the Add button
4. Complete the pop-up
If you wish to differentiate the delivery options in rural or urban areas, offer free shipping above a certain amount or have different delivery prices depending on the weight of the order, this is where you set the rules for it.